About about 40% of claims are initially underpaid or denied...
I learned that number from a claims adjuster I used to work with. He told me something that stuck: “Marcus, if you don’t push back, we assume you agree.” That’s not because adjusters are evil. It’s because they’re overworked. They have dozens of files on their desk. They make an initial determination – sometimes accurate, sometimes not – and move on. If you don’t challenge it, it becomes final.
I had a client – let’s call her Patricia – who learned this the hard way. A tree fell on her garage during a windstorm. The adjuster came out, looked at the damage, and wrote a check for about $8,000. Patricia thought that was fair. Then she got a contractor’s estimate: about $14,000. She called the adjuster. He said “that’s our final offer.” She didn’t know she could appeal. She paid the about about $6,000 difference out of pocket. Later, she found out that her policy included “ordinance or law” coverage that would have paid for upgraded materials to meet new building codes – another about $3,000. She left that on the table too.
When she came to me, I asked why she didn’t appeal. She said “I didn’t know I could.”
That’s the problem. Most people don’t know their rights after a claim denial. So let me walk you through the appeal process, step by step.
Step one: Read the denial letter carefully.
The denial letter is required to state the specific reason for the denial – policy exclusion, lack of coverage, late filing, etc. It will also cite specific policy language. Don’t skim. Look for phrases like “the policy excludes…” or “we determined that…” Write down the exact wording. That’s your starting point.
Common denial reasons for homeowners claims:
“The damage is from wear and tear, not a covered peril.” (Wind, hail, fire are covered. Rust, rot, corrosion are not.)
“The policy excludes surface water or groundwater.” (Flood, sewer backup, seepage.)
“You failed to maintain the property.” (Old roof, neglected gutters, unrepaired leaks.)
“The claim was filed late.” (Most policies require prompt notice.)
“The damage is below your deductible.” (But you may still have a claim if multiple damages add up.)
Patricia’s denial letter said “the tree damage is covered, but the adjuster’s estimate is based on actual cash value, not replacement cost.” She didn’t even know she had replacement cost coverage. The letter was telling her that she could get more by submitting a contractor’s invoice. She missed it.
Step two: Gather your evidence.
You need to prove that the denial is wrong or that the payout is too low. Collect:
The denial letter
Your policy declarations page and the relevant policy language (ask your agent for the full policy if you don’t have it)
Photos and videos of the damage before any repairs
Contractor estimates (at least two)
Receipts for temporary repairs (tarping the roof, boarding up windows)
A log of your time and expenses (lost wages, phone calls, copies)
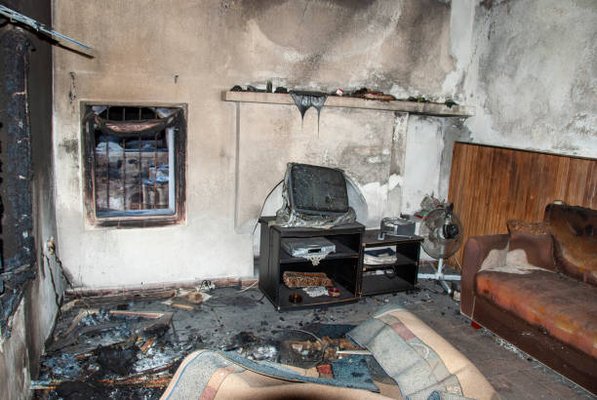
Someone I worked with – let’s call him Tom – had a kitchen fire. The adjuster said the smoke damage was limited to the kitchen. Tom took photos of soot in every room, including closets and the basement. He hired an independent restoration company to do a full assessment. They found smoke damage throughout the house. The adjuster revised the claim from about $12,000 to about $38,000. Tom’s photos and independent estimate made the difference.
Step three: Request a reconsideration in writing.
Don’t just call. Write a letter or email. State your name, policy number, claim number, and the date of denial. Then explain why you disagree, point by point. Attach your evidence. Be polite but firm. Ask for a specific amount.
I’ve drafted many of these letters. A simple template works:
“I am writing to appeal the denial of claim #XXXX. I have reviewed the denial letter dated [date] and believe it is incorrect for the following reasons: [list reasons]. Attached are [photos, estimates, policy language]. Please reconsider and approve payment of $XXXX. Thank you for your prompt attention.”
Send it to your claims adjuster and copy their supervisor. Keep a record of every communication.
Step four: Escalate to a manager.
If the adjuster stands by the denial, ask to speak with a claims manager. Be calm. State the facts. Often, a manager has authority to settle claims that the adjuster does not. I’ve seen managers approve claims that adjusters denied, simply because the homeowner was persistent and organized.
Step five: Request an independent appraisal.
Many policies have an appraisal clause. If you and the insurer disagree on the amount of loss, you can trigger appraisal. You hire an appraiser, the insurer hires an appraiser, and the two appraisers select an umpire. The umpire’s decision is binding. This process costs money – typically about $1,000-3,000 – but can be worth it for large claims.
I remember a couple in Naperville – let’s call them the Millers – who had a hail damage claim. The insurer offered about about $6,000. Their contractor said about $24,000. They triggered appraisal. The independent appraiser awarded about $19,000. After paying their appraiser and half the umpire, they netted about about $16,000 – about $10,000 more than the original offer. Worth it.
Step six: Hire a public adjuster.
A public adjuster works for you, not the insurance company. They take a percentage of the claim payout (typically about 10-20%). They handle everything: documenting damage, negotiating with the insurer, filing appeals. If you’re overwhelmed or the claim is large, a public adjuster can be a good investment. Just check their credentials and fee structure first.
The Coverage Gap Calculator can help you see if you have “ordinance or law” coverage, which is often overlooked.
Step seven: File a complaint with your state insurance department.
If all else fails, contact the Illinois Department of Insurance. They have a consumer complaints division. They will review your case and ask the insurer to respond. This doesn’t guarantee a win, but it puts pressure on the insurer. I’ve seen insurers reverse denials after a state complaint, because they don’t want regulatory scrutiny.
Step eight: Consider legal action.
As a last resort, you can sue. Most homeowner policies have an appraisal clause that you must use before suing, and they may also have a “no assignment” clause that limits your ability to sell your claim. Talk to an attorney who specializes in insurance bad faith. Legal fees are high, but if the denial was clearly unreasonable, you may recover attorney fees.
Now, let me give you a practical checklist for after a loss.
First, document everything immediately. Take photos and video. Save receipts. Write down the names of everyone you talk to.
Second, don’t throw away damaged property until the adjuster has seen it. That’s a common mistake. People clean up, and then the adjuster can’t verify the damage.
Third, get multiple contractor estimates. The adjuster’s estimate is often based on software that uses generic local labor rates. A contractor who sees your actual house may find hidden damage.
Fourth, read your policy. Yes, it’s boring. But focus on the “perils insured against” and “exclusions” sections. Know what’s covered and what’s not.
Fifth, if you’re denied, appeal in writing within the time limit. Most policies give you about 60 days to request a review. Don’t wait.
The Home Insurance Valuator can help you understand your coverage limits before you have a claim.
Patricia – the one with the tree damage – she eventually appealed. She wrote a letter to the claims manager, attached her contractor’s estimate, and pointed out that her policy had replacement cost coverage. The manager agreed to pay about $12,500 – not the full about $14,000, but much better than about $8,000. She also added ordinance coverage for next time.
She told me “I felt so stupid for not fighting earlier.” I told her “you didn’t know. Now you do.”
So here’s your homework. Review your homeowners policy today. Find the section on “how to file a claim” and “appraisal clause.” Put that information somewhere you can find it quickly. Because if a tree falls on your house at 2 AM, you won’t be thinking clearly. You’ll need a plan.
And if you have a claim denied, don’t accept the first answer. Appeal. Escalate. Hire help if needed. The insurance company is counting on you giving up. Don’t.
P.S. Tom – the one with the kitchen fire – he ended up getting a full rebuild. His contractor found that the fire had weakened floor joists, requiring replacement. The adjuster had missed that. Tom’s persistence paid off. He said “I almost took the first check. I’m glad I didn’t.”
By Marcus